
A photomontage verification report is the evidence file that proves a planning visual is accurate, not just convincing. It pairs the image with survey coordinates, camera specifications, and model provenance so a planning officer, inspector, or objector can independently check the view. Without that evidence trail, a photomontage is a picture. With it, the picture becomes a Type 4 verified view fit for a planning submission or appeal.
TL;DR:
- A verified photomontage must include precise survey coordinates, camera metadata, and model provenance to be considered credible for planning purposes.
- Evidence quality relies on documenting every step, from viewpoint selection and survey accuracy to post-production adjustments and model source, to ensure independent verification.
- Type 4 verified views are essential for contentious or significant schemes, with benchmarks set by UK guidance and standards like the Landscape Institute’s visualisation requirements.
- A comprehensive workflow involves selecting survey points, capturing consistent photographs, precise camera matching, and assembling a full audit trail ready for third-party review.
- Inadequate reports often lack signed statements, accurate metadata, and raw data, which can be easily identified and undermine credibility during planning or appeal processes.
Table of Contents
- Essential components of a verification report photomontage
- UK guidance and standards that define a credible verified view
- The verification workflow, from survey to sign-off
- What the deliverables package should actually contain
- Red flags that undermine a photomontage accuracy check
- Briefing and commissioning a verification report that stands up
- Balancing survey precision with visual naturalism in practice
- What actually separates a defensible report from a decorative one
- How Visual Trick approaches a verification report from brief to sign-off
- Commission a planning-ready verified photomontage from Visual Trick
- Sources
Essential components of a verification report photomontage
Planning officers do not take a rendered view on trust. They want a paper trail showing exactly how the image was built, from tripod to final composite, and every credible verification report photomontage is judged against the same checklist.
Start with the viewpoint itself. Every image needs an Ordnance Survey grid reference and a camera height recorded in Above Ordnance Datum (AOD), not just “approximately eye level from the footpath.” This is the detail that lets a third party stand in the same spot years later and confirm nothing has shifted. Alongside it sits the camera metadata: make, model, focal length, sensor size and, ideally, the exact lens used for the site photography, since a mismatched lens is one of the fastest ways to undermine an otherwise solid submission.
Survey evidence comes next. Verified-view methodology typically leans on RTK GNSS or total station data to fix the coordinates of key features in the scene, whether that’s a building corner, a boundary post, or a tree that will frame the new development. This is what makes camera matching possible in the first place: without surveyed points to match against, there is nothing to validate the virtual camera position against reality.
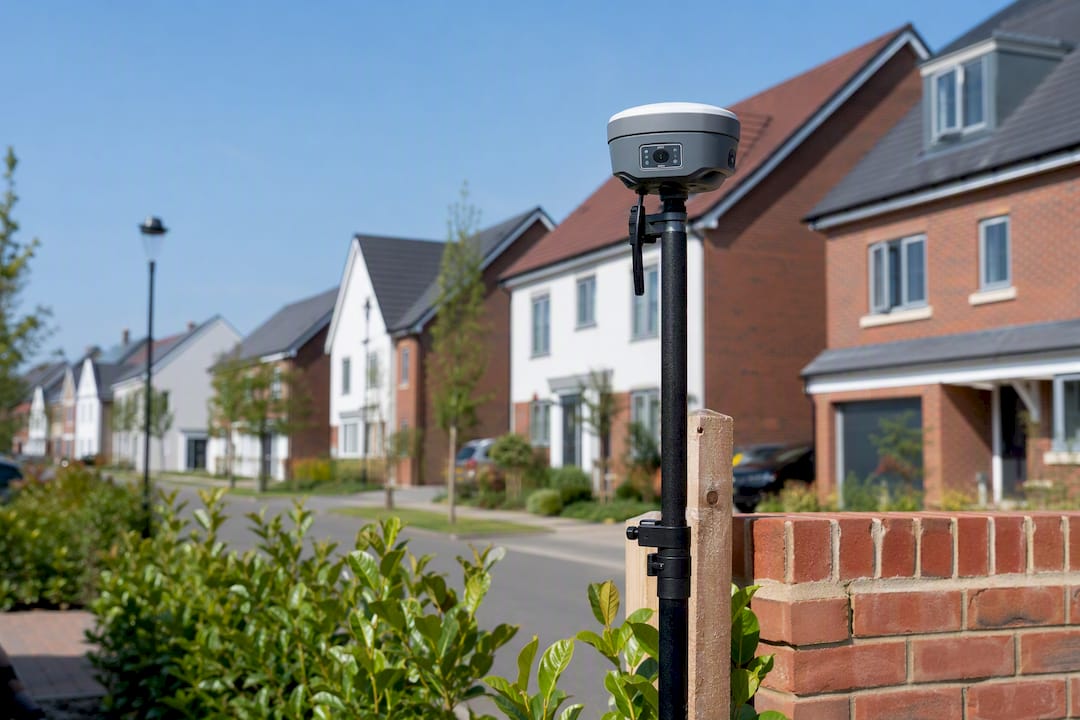
Camera matching evidence and acceptance criteria form the technical core of the report. A camera match is only considered correct when surveyed points sit precisely over their corresponding pixel location in the photograph, and a competent report will show that alignment explicitly, not just assert it happened.
Model provenance matters just as much as the camera work. Reviewers should be told where the 3D model came from (architect’s CAD file, BIM export, or an in-house rebuild), what level of detail it represents, and which version was used for the render, since design changes made after the model was pulled will silently invalidate the image if nobody tracks it.
The remaining pieces round out the audit trail:
- Rendering and lighting notes: date, time, latitude and longitude used to drive the daylight system, plus the render engine and settings applied.
- Post-production log: every manual adjustment (colour grading, sky replacement, seasonal foliage correction) recorded rather than left invisible in the final file.
- Audit trail materials: raw survey data, uncropped source photography, and a record of who captured what and when.
Pro Tip: Ask suppliers for the virtual camera file itself, not just the finished image. A 3ds Max camera export or equivalent lets a third party re-run the alignment check independently, which is exactly the kind of evidence that holds up at appeal.
UK guidance and standards that define a credible verified view
The Landscape Institute’s visualisation guidance is the reference point most UK planning authorities expect a landscape and visual impact assessment (LVIA) to follow. It sets professional expectations for how visualisations are produced and verified, and it is the document practitioners cite when justifying methodology in a planning statement. Referencing it by name in your report signals that the work follows recognised practice rather than an ad hoc studio process.
Alongside Landscape Institute guidance, it’s worth knowing what a strong exemplar looks like in practice. The Planning Inspectorate has published photomontage evidence as part of Nationally Significant Infrastructure Project submissions, and the EN020002-000741-5.8 Photomontages document%20Photomontages.pdf) is a useful benchmark. It demonstrates photomontages built with quantifiable survey data and full procedural transparency, exactly the standard an inspector will expect to see repeated in smaller residential or commercial applications.
Not every visualisation needs this level of rigour. Verified views, classified as Type 4 visualisations in industry practice, sit at the top of a hierarchy that runs from rough sketch overlays through to fully surveyed, camera-matched composites, as set out in the Long Point Loughrea verified views booklet. Type 4 status is generally reserved for:
- Schemes likely to be contested at appeal or public inquiry
- Sites affecting designated landscapes, conservation areas, or listed building settings
- Applications where visual impact is a principal reason for refusal risk
- Large infrastructure or major residential schemes requiring a full LVIA
For a straightforward extension in an unremarkable setting, a well-composed but unverified visual might suffice. For anything contentious, submitting less than a Type 4 verified view invites an objector, or the planning committee itself, to question the image’s honesty rather than the scheme’s merits. That distinction is worth raising early with a client, before the wrong level of rigour gets baked into the budget.
The verification workflow, from survey to sign-off
A verified photomontage is built in a fixed sequence, and skipping a stage almost always shows up later as a gap in the audit trail. Here is how the process runs in practice.
- Select and survey the viewpoints. Choose locations that represent genuine visual receptors, footpaths, residential windows, or public vantage points, then fix each one with an OS grid reference and AOD camera height. Tripod set-up should be documented: leg spread, head type, and levelling method, since a bubble level out by even a couple of degrees introduces distortion that compounds later.
- Photograph to a consistent standard. Shoot in raw format, note the exact field of view, and keep tripod height consistent across the photoset. A common presentation convention uses a 39.6-degree field of view per viewpoint, matching what the human eye perceives as a natural single-frame view, as set out in the Long Point Loughrea methodology.
- Capture survey data. RTK GNSS typically achieves centimetre-level accuracy for open sites; a total station is often preferred where GNSS signal is unreliable, such as under tree canopy or close to tall buildings. Both methods should be recorded with their expected accuracy stated in the report, not just the coordinates themselves.
- Bring the 3D model into the workflow. Check the CAD or BIM file against the survey datum, confirm the level of detail matches what the scheme actually requires (a full material and glazing model for close viewpoints, a simplified massing model for distant ones), and log the exact file version and date received from the architect.
- Run camera matching. Align the virtual camera to the surveyed points until pixel-to-point alignment is achieved across multiple reference features, not just one. Where the camera-to-target distance exceeds roughly 1.5 kilometres, earth curvature and atmospheric refraction start to introduce measurable error, and practitioners should calculate and document a Z-axis compensation rather than ignore it.
- Replicate lighting conditions. Set the render’s daylight system using the actual date, time, latitude and longitude of the site photography. A render lit for a summer afternoon composited onto a winter morning photograph is an immediate credibility problem, however good the modelling underneath it.
- Composite with correct occlusion. Foreground elements (existing trees, fences, parked vehicles) must sit in front of the proposed development where they genuinely would, and any manual masking work needs a note in the post-production log.
- Package the audit trail. Assemble survey data, raw photography, camera files, model version records, and signed statements into a single evidence pack that a third party could pick up cold and reconstruct the verification independently.
Pro Tip: Request the survey accuracy figures in writing before commissioning, not after delivery. A supplier who can’t quote expected RTK or total station tolerances for your site conditions probably hasn’t thought through the verification chain in enough detail.
The step most often rushed is the last one. Studios under deadline pressure will happily hand over a beautiful final image and quietly skip the packaging stage, leaving the client with nothing to show a planning inspector who asks “how do we know this is accurate?”
What the deliverables package should actually contain
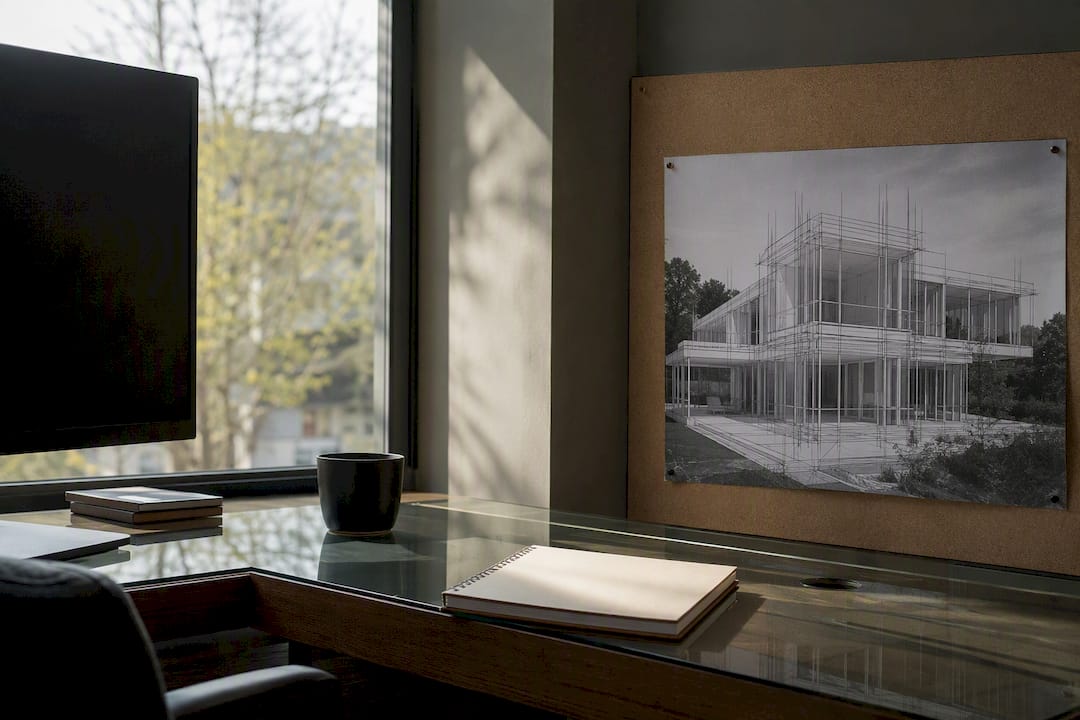
A verification report is only as useful as what physically arrives in the folder. Image outputs should include a wireline overlay (showing the model geometry against the raw photograph before rendering), the fully rendered image, and the final composited version, each supplied at a stated pixel dimension suitable for the intended print or screen size.
Data outputs matter just as much as the pictures. Expect a survey CSV listing every captured point with its coordinates, a camera metadata file recording lens and sensor details per viewpoint, and, ideally, the virtual camera file itself so the alignment can be re-run independently.
Supporting documents complete the pack: a signed surveyor’s statement confirming the survey methodology and accuracy achieved, a signed photographer’s statement confirming camera settings and capture conditions, and a model version log tying the final render back to a specific, dated architectural file.
Printed photomontages are generally sized to give a viewing distance between 300mm and 500mm, the distance recommended in verified-views practice to preserve a correct sense of scale when a committee member or inspector holds the page.
That figure matters more than it looks. A photomontage printed too small, or bound into an A4 planning pack at the wrong scale, distorts the viewer’s perception of how large the proposed building actually appears, undermining the verification work no matter how rigorous the survey behind it. Layout guidance should specify the intended print size alongside the image, not leave it to whoever assembles the final planning document.
Red flags that undermine a photomontage accuracy check
Reviewers who know what to look for can spot a weak verification report photomontage in minutes, often before reading a single page of the methodology.
The most obvious red flag is missing coordinates. If a report gives a general description of the viewpoint (“taken from the footpath near the church”) instead of an OS grid reference and AOD height, there is no way to independently confirm the camera position, and that alone should trigger further questions.
A second warning sign is the absence of signed statements. A surveyor’s or photographer’s statement confirming their own methodology gives a planning inspector a named, accountable source to challenge if the evidence is disputed at appeal. Without it, the report has no one standing behind the numbers.
Watch for these patterns in particular:
- Inconsistent metadata between the stated camera lens and what the field of view in the image actually suggests.
- Undeclared post-production, especially sky replacement or colour grading that changes the perceived time of day or weather.
- Unverifiable model sources, where the 3D model’s origin or version is never stated.
- Vegetation shown out of season, which matters more than it sounds since a bare-branch winter viewpoint dressed with summer foliage in the render misrepresents actual screening.
There are also genuine technical limits worth acknowledging rather than glossing over. Long-distance viewpoints introduce refraction effects that need explicit compensation, as noted above. Seasonal vegetation changes mean a single verified view can only ever represent one moment in the landscape’s annual cycle, and texture matching between rendered and photographed materials involves a degree of subjective judgement that no amount of survey data eliminates entirely.
Pro Tip: If a submission looks too polished to check, ask the supplier directly for the raw survey CSV and the unretouched site photography. A studio confident in its own verification work will hand both over without hesitation; one that hesitates has probably skipped a step. Where technical authenticity is genuinely disputed, image forensics techniques using neural network based detection can identify manipulated regions in a photograph, though this level of scrutiny is rarely needed outside contested appeals.
Briefing and commissioning a verification report that stands up
Getting a strong verification report photomontage starts with a clear brief, not a vague request for “a few visuals for the application.” A short commissioning document should specify:
- Scope: how many viewpoints, and why each one was chosen as a representative visual receptor.
- Deliverables: wireline, rendered, and composited images, plus the full data and documentation package described earlier.
- Acceptance criteria: the pixel alignment tolerance for camera matching, and confirmation that survey data will be independently checkable.
- Timescale and format: print sizes, file formats, and the deadline against the planning submission date.
Delivery timelines vary considerably by scope. A single verified viewpoint on a straightforward site, where survey access is easy and the model already exists, can often be turned around within one to two weeks. A small multi-view package of three to five viewpoints typically needs three to four weeks once survey, modelling, and rendering are sequenced properly. Major schemes requiring a dozen or more viewpoints across a large site, particularly where public inquiry is likely, should be budgeted with several months’ lead time, since survey scheduling and multiple rounds of design-freeze coordination with the architect tend to be the real bottleneck, not the rendering itself.
Cost is driven less by the render quality and more by the survey and coordination overhead. Site access difficulty, the number of viewpoints, model complexity, and how many design iterations happen before the scheme is frozen all push the fee up. The single biggest lever for reducing cost without sacrificing verification is locking the architectural model early: every late design change that forces a re-render costs more than the original modelling did.
Before appointing a supplier, ask direct questions: what survey method will they use and what accuracy can they guarantee, will they supply the virtual camera file, who signs the surveyor’s and photographer’s statements, and can they point to a comparable verified view they’ve delivered for a UK planning authority. A supplier who answers all four without hedging is worth commissioning; one who answers none of them probably isn’t building a genuinely verifiable product.
Balancing survey precision with visual naturalism in practice
Verification is not purely mechanical, and pretending otherwise does the profession a disservice. Survey data fixes where the camera sits and where the model geometry belongs, but getting a render to look convincingly like the photograph it sits inside still involves qualitative judgement: matching material weathering, adjusting saturation to sit correctly against the sky in the source photograph, and softening edges where a perfectly clean CAD render would otherwise look pasted on. None of that undermines accuracy, provided it is written down. A report that documents “saturation adjusted to match ambient light conditions in source photograph, applied uniformly across proposed structure” is auditable. A report that makes the same adjustment silently is not, and that gap is exactly where credibility gets lost at appeal.
Visualtrick builds photomontage verification reports around this principle: every qualitative step gets logged alongside the survey data, so the finished evidence pack holds up to the same scrutiny as the coordinates themselves. The studio’s CGI photomontage work is built specifically for planning submission use, which means the audit trail is assembled as standard rather than bolted on when a planning officer asks for it.
That approach matters most on the sites where visual impact is genuinely contested: heritage settings, AONBs, or schemes near residential receptors where objectors will scrutinise every metre of apparent scale. A few things consistently separate a report that survives challenge from one that doesn’t:
- Survey and camera data recorded and cross-checked before any rendering work begins, not retrofitted afterwards.
- Post-production changes logged as they happen, in a running document, rather than reconstructed from memory once the final image is signed off.
- Model version control tied explicitly to the architect’s own file naming and dates, so there is never ambiguity about which design iteration was actually visualised.
- A finished verified views package that a planning consultant can hand to an inspector without needing to phone the studio for missing information.
The technical work is demanding, but it’s rarely the part that trips submissions up. The gap is almost always documentation, and closing it is what actually protects a scheme through committee and appeal.
What actually separates a defensible report from a decorative one
Most guidance on this topic treats verification as a box-ticking exercise: get the coordinates, get the camera specs, done. That misses the real fault line, which sits between reports built to survive a challenge and reports built to look thorough on first read. The two can be visually identical and still fail differently at appeal.
A decorative report has all the right section headings but no working audit trail behind them. It states a grid reference without the survey method used to obtain it. It mentions camera matching without showing the pixel alignment that proves it happened. A planning inspector experienced enough to ask a second question will find the gap in about thirty seconds, and once one section is shown to be hollow, every other claim in the report gets read with suspicion.
What surprises most people commissioning their first verified view is how much of the credibility comes from the boring parts: the signed statements, the version log, the raw CSV nobody will ever open unless something is disputed. The render itself, the part everyone worries about most, is usually the easiest piece to get right. Skilled studios produce photorealistic composites routinely. Producing an evidence trail that a stranger can independently reconstruct is the harder, less glamorous skill, and it’s the one that actually wins or loses arguments at committee.
The other underappreciated point is that documenting subjective judgement openly makes a report stronger, not weaker. Practitioners sometimes hide manual adjustments, worried that admitting to “artistic” decisions undermines the scientific framing of the survey data. The opposite is true. A report that says exactly what was adjusted and why reads as more trustworthy than one that implies the entire image emerged mechanically from coordinates, because nobody genuinely believes that anyway.
— Paride
How Visual Trick approaches a verification report from brief to sign-off
Every verification report Visualtrick delivers starts from the same principle: the survey data and the finished image have to tell the same story to anyone who checks them independently. That means fixing viewpoints with proper OS coordinates and AOD heights before a single frame is rendered, logging camera and lens specifications alongside the site photography, and keeping a running record of every post-production decision so nothing has to be reconstructed from memory later.
Commissioners working with Visualtrick can expect a clear evidence package on delivery, not a set of images with documentation promised “if needed.” That includes the wireline, rendered, and composited outputs, the survey and camera metadata, and signed statements confirming methodology. For planning submissions where the scheme is likely to be contested, that package is built to support the application through committee and, if necessary, through appeal, without requiring last-minute scrambling for missing evidence.
The workflow is built around UK planning practice specifically, referencing Landscape Institute guidance and Type 4 verified view conventions throughout, so the deliverable arrives already in the format a planning officer or inspector expects to see rather than needing translation into local practice after the fact.
Commission a planning-ready verified photomontage from Visual Trick
Visualtrick is the practical alternative to assembling survey data, camera matching, and rendering across separate suppliers and hoping the audit trail holds together at the end. One studio handles the full verification chain, survey coordination, camera matching, modelling, rendering, and the final evidence pack, so nothing gets lost between handoffs and nothing arrives without the documentation a planning officer will actually ask for.

That matters most on schemes where visual impact genuinely decides the outcome: sites near listed buildings, in conservation areas, or facing likely objection at committee. Visualtrick’s CGI for planning applications service is built specifically around this brief, producing verified views with the survey precision, camera metadata, and audit trail that stand up to scrutiny at inquiry as well as they do at first submission. Architects and planning consultants can also draw on the studio’s wider architectural visualisation work for schemes needing marketing-grade imagery alongside the planning package.
If you’re preparing a submission where the visual evidence needs to survive a genuine challenge, get in touch with Visualtrick to scope viewpoints, timescales, and the deliverables your planning consultant will need.
Sources
Several documents referenced throughout this guide are worth bookmarking directly for future submissions:
- Verified views / photomontages (Alton Estate verified views methodology)
- Landscape Institute visualisation guidance
- Long Point Loughrea verified views photomontage booklet
